
Looking for some PHP/Magento contract work
I am looking for some contract work for PHP and/or Magento. Magento 1 is where my primary focus lies, though I have done work on Magento 2 as well. In terms of the type
I am looking for some contract work for PHP and/or Magento. Magento 1 is where my primary focus lies, though I have done work on Magento 2 as well. In terms of the type

Just a quick post up here to help you out. I have a customer who is running their entire Magento operation on on AWS, using RDS as the database. It works quite well, actually.

About a month ago a client of mine was lamenting the fact that they didn’t have insight into what was going on with their cron jobs. So I did what any idiot would do

Looking back, 2010 was a really good year for me. It was a few years prior to my time at Magento ECG; I had just left the Zend Global Services group and had become
Introduction A few days ago there was a question on Twitter about using Docker in production instead of development. I was a little intrigued by the question because my experience has been in the

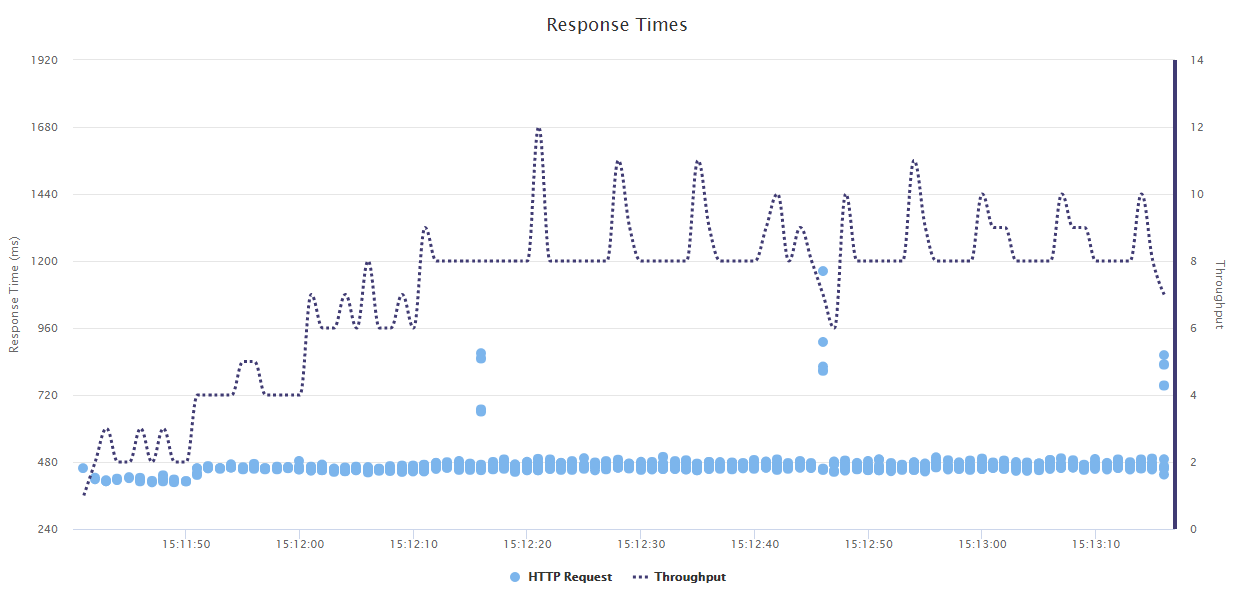
With the holiday season coming upon us more quickly than we would like, preparing your site for the holiday season is a required activity. Load testing your Magento installation is a must before your
Over the past several days (more than I would like to admit) I’ve been working on getting a system based off of Jetty and ActiveMQ to work out of the box for PHP developers. While “out
Yesterday I wrote a blog post on my surprising finding that Jetty was able to out-perform, or at minimum keep up (depending on how you looked at the numbers), Nginx when it comes to
Having spent now about two months building out Magium there are a couple of things that are worth sharing as I’ve been working through several different versions of Magento. These practices (best practices?) may
A few weeks back I asked a question on Twitter about browser testing. There weren’t a ton of responses but the responses I got were about what I expected. Around 80% of Magento developers